

Touch Activated Recycled CD Glow-in-the-Dark Lamp Project
The day has come for you to recycle those antique compact discs! While you couldn’t quite bring yourself to throw them away, you can now rest easy knowing you have put them to good use. So, turn up the iTunes and get busy with this nifty fall project!
Step 1: Required Tools/Supplies
- Time
- 3D printer
- LED (Flickerflame LEDs give a fire like glow)
- Soldering Iron
- Wire
- USB cable (shortcut: cut one off an old usb mouse)
- 5v Touch Switch
- Old Hard Disk Drive (should not be functioning as we will be removing the HDD platter to provide a conductive plane to act as a switch)
- 3 3″ Threaded Rods
- 3 Acorn Nuts
- 1 Nut
- Drill Press
- Old CDs
- FreeCAD (or other design software)
- Wire Crimping Tool
Step 2: Tips for Gathering Materials
- Hardware Store: Threaded Rods, Acorn Nuts, Nut, Crimp Wire Tool
- eBay: Flicker Flame, LEDs, 5v Touch Switch
- FreeCAD: Lamp Base, Lamp Top, Hole Drilling Jig
- Recycle: Hard Disk Drive, USB Cable, CDs
Step 3: Use FreeCAD (or other design software) to Create Lamp
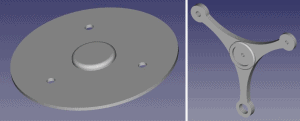
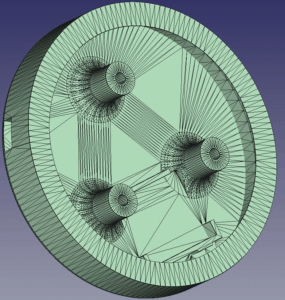
Draw up a base and a top, as well as a hole-drilling jig that fits just nicely inside the CD hole so that the holes all nicely line up. It helps to drill each hole one at a time, one disk at a time.
Step 4: Printing
The images show parts printed with glow-in-the-dark PLA on a Solidoodle3. (Note: the author mostly prints in ABS and was very surprised at how forgiving PLA is. Learn more about the difference between PLA and ABS here.)
Step 5: Assembly
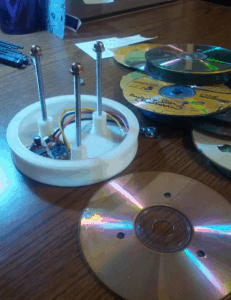
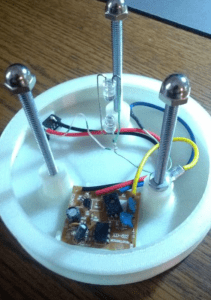
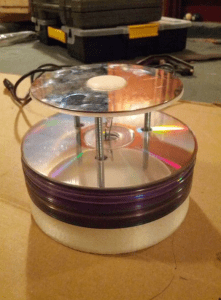
After all CDs have been drilled with three holes and the lamp parts have been printed, it’s time to assemble the lamp. As you can see from the images, the PCB (printed circuit board) for the touch switch fits easily in the allotted spot and the three threaded rods screw in nicely. Ground it to one of the rods with the nut. (Remember to make one of the holes in 3-4 of the CDs a bit bigger to accommodate this nut.) Try to get the rods all the same length. (Tip: screw the acorn nuts on and use them to level.)
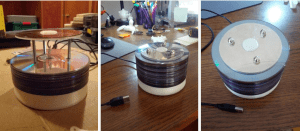
Next, wire power in and add the LED’s. (The author notes: “I stacked the LEDs – trying to get light out at all angles, but feel free to try various arrangements.”) Once everything is all wired, it’s time to test it. The end result: With just a touch to that one rod with the switch grounded to it, your brand new recycled CD lamp should light up!
Comment below to let us know when you give this project a try. We’d love to know how it went and what worked well. Feel free to offer some tips in the comment section for the OBP community.
And then some,
Your friends @OBP
-Repurposed content with permission from original author, Instrucables member Onus. Original source found here.
Recent Comments